JS – Queue Manager

A continuación expongo una solución para solventar la problemática de ejecutar múltiples peticiones simultaneas pero pidiendo controlar que cantidad de concurrencias hay,

De esta forma podremos crear un pequeño objecto que permite gestionar la cola automáticamente y con eventos que indica cuando se ha finalizado un proceso o todo el lote de el

type typeFinishJobFunc = {
    uuid: number,
    status: string,
    job: any,
    jobPromise: any
}
type typeStartJobFunc = {
    uuid: number,
    job: any,
    jobPromise: any
}
type typeJob = {
    task: () => Promise<unknown>
}
class QueueManager {
    uuid: number
    jobs: typeJob[]
    concurrentJobs: number
    status: string
    executingJobs: any[]
    finishedJobs: any[]
    errorJobs: any[]
    stoppingFunc?: (isAlreadyStopped: boolean) => void
    stopedFunc?: () => void
    finishedFunc?: () => void
    updateFunc?: () => void
    startJobFunc?: (object: typeStartJobFunc) => void
    finishJobFunc?: (object: typeFinishJobFunc) => void
    constructor() {
        this.uuid = 0
        this.jobs = []
        this.concurrentJobs = 8
        this.status = 'stopped'
        this.executingJobs = []
        this.finishedJobs = []
        this.errorJobs = []
    }
    executeJobs(jobs: typeJob[]) {
        if (this.status !== 'stopped') return false;
        this.uuid = 0
        this.status = 'processing'
        this.executingJobs = []
        this.finishedJobs = []
        this.errorJobs = []
        this.jobs = jobs
        this.update();
        for (let i = 0; i < this.concurrentJobs; i++) {
            if (this.jobs.length > 0) {
                this.startQueue()
            }
        }
        return true;
    }
    update() {
        if (this.updateFunc) {
            this.updateFunc()
        }
    }
    startQueue() {
        const job = this.jobs.shift()
        if (job) {
            const uuid = this.uuid
            this.uuid++
            const jobPromise = job.task()
                .then(() => {
                    this.finishedJobs.push(job)
                    if (this.finishJobFunc) {
                        this.finishJobFunc({
                            uuid,
                            status: 'success',
                            job,
                            jobPromise
                        })
                    }
                })
                .catch(() => {
                    this.errorJobs.push(job)
                    if (this.finishJobFunc) {
                        this.finishJobFunc({
                            uuid,
                            status: 'error',
                            job,
                            jobPromise
                        })
                    }
                })
                .finally(() => {
                    const indexUuid = this.executingJobs.findIndex(j => j.uuid === uuid)
                    this.executingJobs.splice(indexUuid, 1)
                    this.update()
                    if (this.status === 'processing') {
                        this.startQueue()
                        return
                    }
                })
            this.executingJobs.push({
                uuid,
                job,
                jobPromise
            })
            this.update()
            if (this.startJobFunc) {
                this.startJobFunc({
                    uuid,
                    job,
                    jobPromise
                })
            }
        } else {
            if (this.executingJobs.length === 0) {
                this.status = 'stopped'
                this.update();
                if (this.finishedFunc) {
                    this.finishedFunc();
                }
            }
        }
    }
    stop() {
        if (this.status === 'procesing-stop') {
            if (this.stoppingFunc) {
                this.stoppingFunc(false);
            }
            return false;
        }
        this.status = 'procesing-stop'
        this.update()
        if (this.stoppingFunc) {
            this.stoppingFunc(true);
        }
        Promise.allSettled(this.executingJobs.map(p => p.jobPromise))
            .then(() => {
                this.status = 'stopped'
                this.update()
                if (this.stopedFunc) {
                    this.stopedFunc();
                }
            })
    }
    getAllJobs() {
        return this.executingJobs.length + this.finishedJobs.length + this.errorJobs.length + this.jobs.length
    }
    getCurrentFinishedJobs() {
        return this.finishedJobs.length + this.errorJobs.length
    }
}
export {
    QueueManager
}

La forma de uso:

const queueManager = new QueueManager();
queueManager.concurrentJobs = 1;
queueManager.startJobFunc = () => console.log('Job started');
queueManager.finishedFunc = () => console.log('job finished');
queueManager.stoppingFunc = () => console.log('Stopping queues')
queueManager.stopedFunc = () => console.log('job stopped');
queueManager.updateFunc = () => console.log('job updated');

const jobs = [];

fileNames.forEach(fileName => jobs.push({
    fileName: fileName,
    task: () => {
        return new Promise((resolve, reject) => {
            console.log('do_stuff')
        })
    }
}));

queueManager.executeJobs(jobs);
JS – Semaphore

A veces no interesa evitar que muchas peticiones asíncronas se ejecuten en paralelo, por motivos de rendimiento limite de CPU o bien por lógica del programa que debe esperar a que finalice el bloque completo antes de permitir dejar pasar a la siguiente petición,

Para ello podemos crear un semáforo, que solo permitirá la ejecución del código de 1 e 1 (o de varios si se le configura)

Caso de uso: podemos tener un servidor express que recibe simultáneamente diferentes peticiones, pero una función que necesita ser ejecutado 1 a 1 sin poder ser concurrentes, por ejemplo comprimir un archivo y enviarlo

export class Semaphore {

    currentRequests: any[]
    runningRequests: number
    maxConcurrentRequests: number

    constructor(maxConcurrentRequests = 1) {
        this.currentRequests = [];
        this.runningRequests = 0;
        this.maxConcurrentRequests = maxConcurrentRequests;
    }


    callFunction<T>(fnToCall: () => Promise<T>, ...args: any): Promise<T> {
        return new Promise((resolve, reject) => {
            this.currentRequests.push({
                resolve,
                reject,
                fnToCall,
                args,
            });
            this.tryNext();
        });
    }

    tryNext() {
        if (!this.currentRequests.length) {
            return;
        } else if (this.runningRequests < this.maxConcurrentRequests) {
            let { resolve, reject, fnToCall, args } = this.currentRequests.shift();
            this.runningRequests++;
            let req = fnToCall(...args);
            req.then((res: any) => resolve(res))
                .catch((err: any) => reject(err))
                .finally(() => {
                    this.runningRequests--;
                    this.tryNext();
                });
        }
    }
}

Forma de uso:

// Funcion genérica que devuelve una promesa
const compress = (encoding: string, md5: string): Promise<string> => {
    return new Promise((resolve, reject) => {
        // do stuff
    })
}

...

// Llamada a la función "callFunction"
const throttler = new Semaphore(1);
throttler.callFunction(() => compress('codec', 'xxx'))

Fuente original: https://medium.com/swlh/semaphores-in-javascript-e415b0d684bc

Sustituto al WOL

No te ha pasado que tu placa base no soporta Wake On Lan y no puedes encender el PC remotamente por red?

Bueno aquí os enseño un pequeño apaño para poder encender el PC e incluso hacer un Hard Reset fisico.

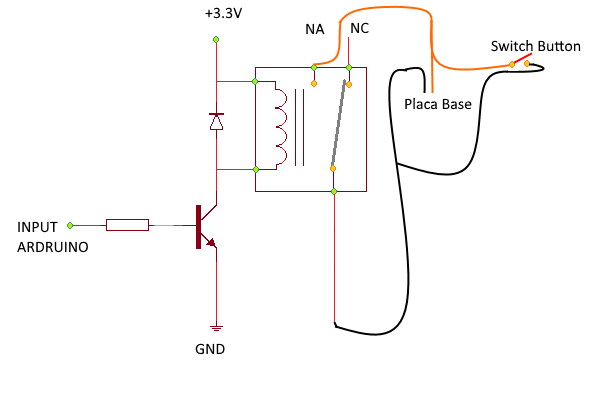
Con un Raspberry PI cerca y un relé podéis montar este circuito para poder encender y apagar el PC.

El cable que va de la placa base al botón de encendido lo cortáis y lo conectáis al relé como se ve en el circuito, uno de los cables va conectado al común y el otro al Normalmente Abierto, en el corte conectáis el mismo cable cortado al relé para que pueda hacer contacto.

De esta manera tanto el boton como el rele funcionarán

Los 3,3V, GND y Input va conectado al Ardruino, dependiendo del relé el voltaje puede variar.

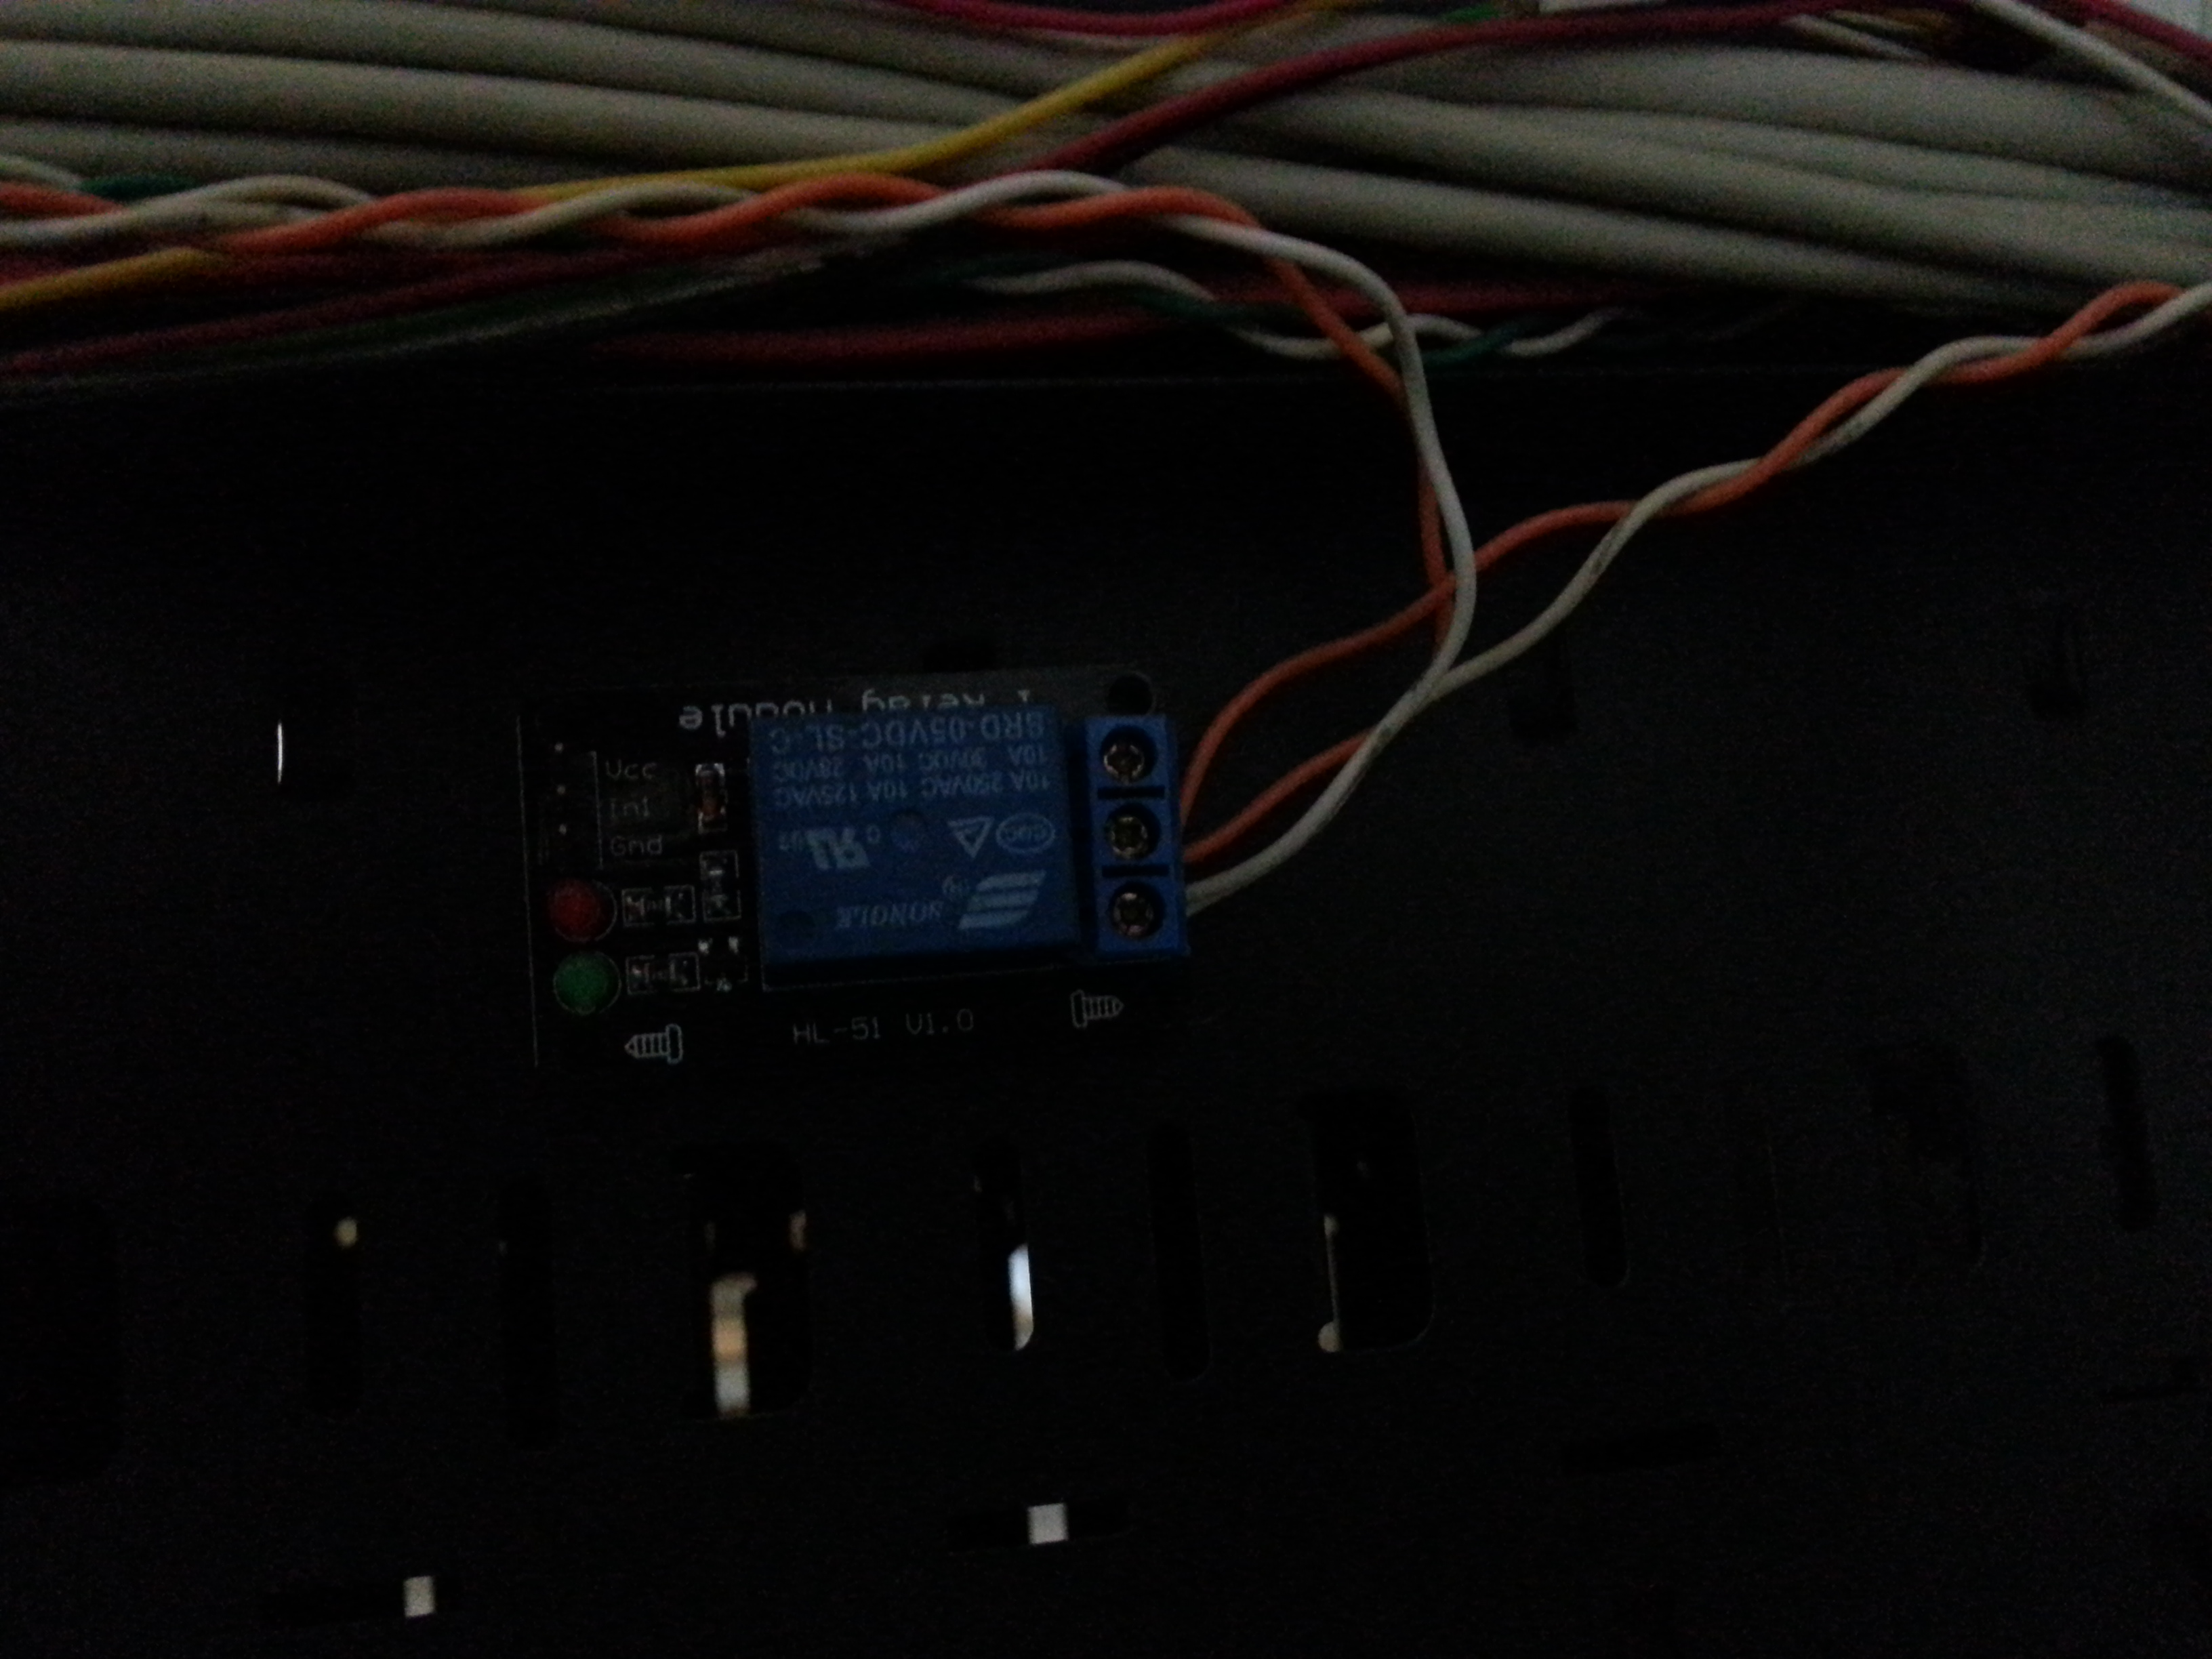
Quedará algo así:

Como veis lo he pegado a la carcasa lateral interna de la torre, tened cuidado que algunos circuitos pueden hacer contacto con la torre y provocar un cortocircuito. En mi caso he utilizado silicona térmica para pegarlo y crear un espacio entre la torre y el circuito del relé.

Luego el VCC IN GND va conectado a la Raspberry PI, tenéis que buscar algún método para sacar el cable, es un poco rudimentario pero con un cable de red me funciona perfecto.

Con un hueco que he dejado abierto en la parte frontal, aun que hay algunas cajas que tienen agujeros en la parte trasera para dejarlo mas disimulado.

Ahora todo conectado al Ardruino con python envías los impulsos al relé para apagar / encender el PC =)

Tienes que escribir el siguiente código en python:


#!/usr/bin/env python
# -*- coding: utf-8 -*-

import RPi.GPIO as io
import time

io.setmode(io.BCM)
io.setwarnings(False)

io.setup(4,io.OUT)

io.output(4,1)
time.sleep(2)
io.output(4,0)

io.cleanup()

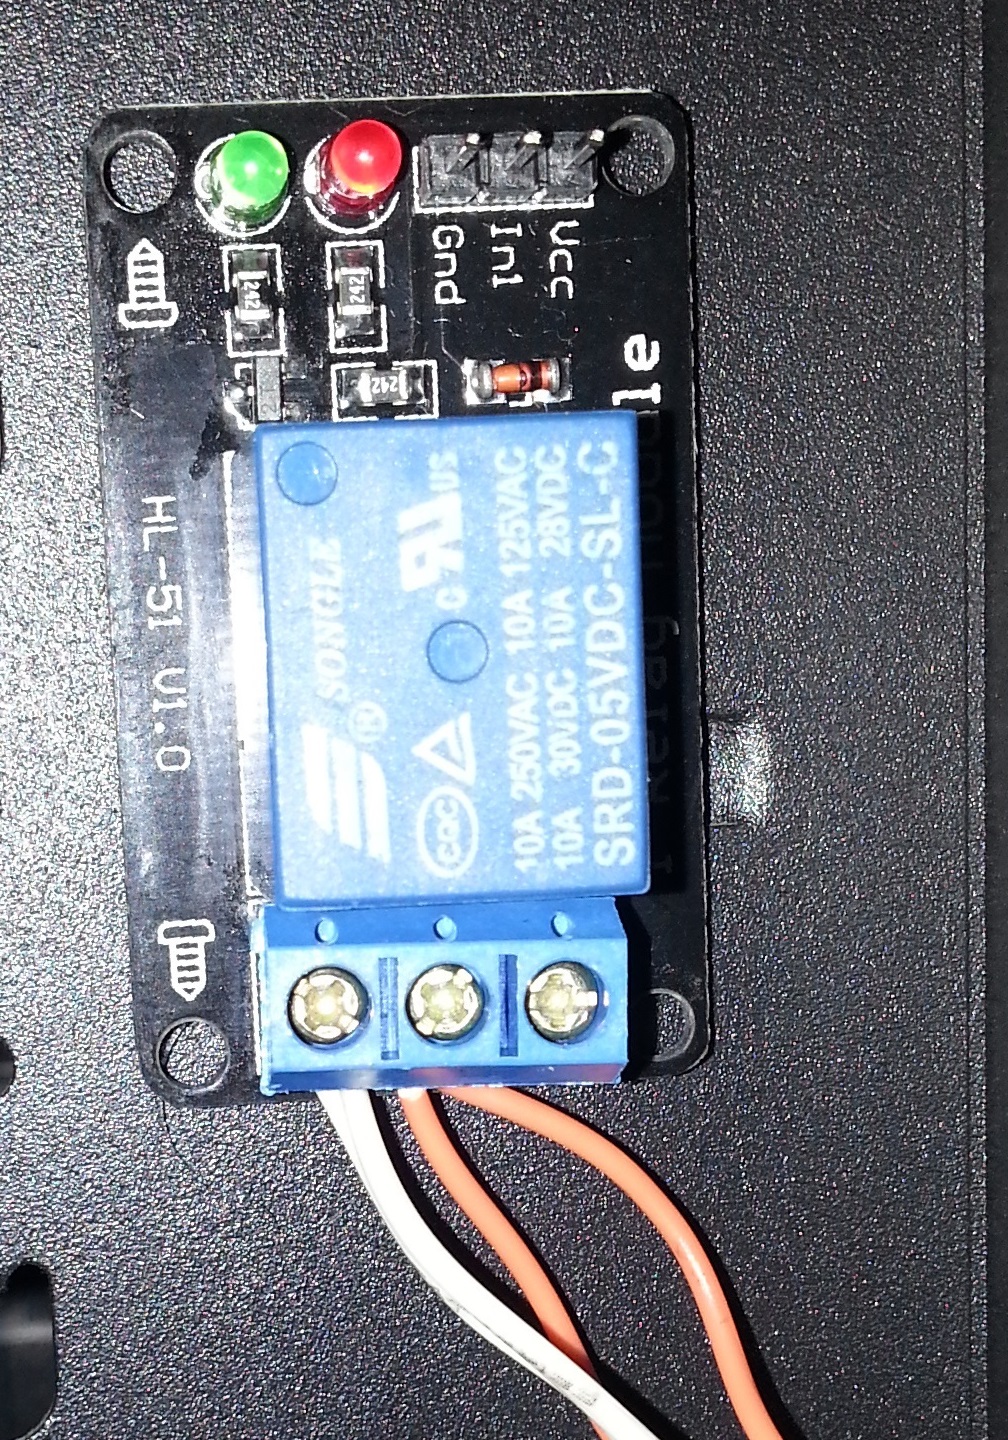
En la raspberry se debe conectar 5V y el GND y en el caso de mi script el GPIO.4

Os dejo una imagen de la placa:

Ahora ya puedes ejecutar al script para encender y apagar el equipo,

Espero que os sirva!

Un saludo!